Author name: Donovan Hill

Free 3D Modeling Software for Creators
2D Animation, 3D Animation, 3D Animation Software, All, Animation Services

The Best Free 3D Modeling Software in 2025

In today’s media landscape, 3D animation and graphics are everywhere. From eye-catching book covers and stunning artwork to immersive video games, innovative apps, blockbuster movies, and popular TV shows, 3D elements are an integral part of our visual experience. The prevalence of 3D graphics is undeniable. But have you ever wondered about the origins of these intricate 3D creations? These captivating objects are often created through a sophisticated process known as 3D modeling, where your role as a creator is essential. 3D modeling software plays a crucial role across various industries, including gaming, architecture, engineering, and medical imaging. Its importance is immense, serving as the foundation for creating detailed 3D models. Mastering this process requires a blend of artistic flair, technical knowledge, and the right tools. For newcomers, the range of 3D modeling tools can seem overwhelming. Fortunately, you don’t need to break the bank to get started. There are numerous free 3D modeling software options available that can help you unlock your creative potential. Whether you’re a hobbyist or an aspiring professional, these tools offer a great way to experiment and refine your skills. Ready to explore the world of 3D modeling? We’ve put together a list of the top free 3D modeling software available in 2024, perfect for diving in and bringing your unique creations to life. What is the Best Free 3D Design Software? Based on our experience, the early days of three-dimensional modeling (3DM) were defined by a limited range of commercial software, none of which was freely available. Pioneering tools like Sketchpad, 3ds Max, and AutoCAD quickly became indispensable, enabling Autodesk (a name still with significant influence) to secure a dominant early position in the field. The expansion of the internet and the advent of open-source technology marked a turning point. Free 3D modeling software began to emerge, revolutionizing the market. Today, a wide variety of free 3D modeling tools are available, empowering beginners and professionals. This transformation has democratized 3D modeling, making it more accessible, inclusive, and versatile. Guide to Free 3D Modeling Software: Best Tools for Beginners and Professionals Choosing the right free 3D modeling software can be a daunting task given the multitude of high-quality options available. These tools cater to a range of skill levels, from those ideal for beginners to more advanced software for seasoned professionals. Starting with user-friendly options allows beginners to build confidence and skills, while more advanced tools can be explored as you progress and seek greater control over your creative projects. The Best Free 3D Modeling Software List for 2025 As the internet has expanded, free 3D modeling software for 3D printing has surged in popularity. Today, there’s a wide type of free options available to both beginners and professionals. Whether you’re just starting or looking to refine your skills, these tools offer a range of features to meet your needs. Curious about which free 3D modeling software stands out? Let’s explore the top choices and find the perfect fit for your next project! 1. Blender: Source: Blender Blender stands out as one of the most accessible 3D modeling tools, offering a wealth of creative possibilities. As a robust, open-source software, it has gained acclaim for its flexibility and extensive feature set, making it a top choice for 3D modeling. Its popularity is well-deserved, thanks to its powerful rendering engine and Cycles feature, which enable animators to create highly detailed and photorealistic images. Blender is favored by both amateurs and professionals for creating dynamic space scenes and intricate motion graphics. Additionally, many production studios utilize Blender to generate special effects in high-budget films. Blender excels in seamlessly integrating 2D animation with 3D models, allowing users to create stunning visuals and take their projects to new heights. With continuous updates and a vibrant community, Blender remains at the forefront of 3D modeling software, making it a versatile and invaluable tool for artists and creators. After we tested it in practice, let’s look at the pros and cons of this beloved 3D modeling software. Pros Cons Expansive range of tools: Blender offers a wide array of tools and options, catering to diverse creative needs in 3D modeling. Complex user interface: The extensive features result in a UI that can be overwhelming for beginners, leading to a steep learning curve. Support for multiple render engines: Blender supports three different render engines, providing versatility and adaptability for various projects. Design issues in early versions: Early versions of Blender had design flaws, which, while mostly resolved, may still concern some users. Compact size and stability: Despite its feature-rich nature, Blender has a light system footprint and offers reliable stability for complex projects. Inconsistent add-on support: Some add-ons and plugins may become incompatible with new updates, disrupting workflows. 2D art support: Blender also supports 2D artistic projects, making it a versatile choice for both 2D and 3D creators. Extensive learning resources: Blender provides a wealth of guides and tutorials to facilitate learning and exploration for users of all levels. 2. Sketchup: Source: Sketchup SketchUp is another widely recognized free 3D modeling software known for its emphasis on precision, making it ideal for constructing 3D objects from scratch. While it may not be the top choice for interior or landscape design, it has gained traction for its flexibility, allowing users to create anything from towering buildings to intricate small objects. Its appeal extends to designers who appreciate the ability to build user-generated object libraries and utilize pre-made components in their projects. SketchUp offers four versions tailored for various professional needs, with enhanced tools for more advanced use. The free version of SketchUp, accessible through a web browser, is well-suited for home users. For those seeking a more extensive toolset, SketchUp also provides subscription options for iPad and web-based 3D modeling, offering support across browsers, desktops, and tablets. With its intuitive interface and robust capabilities, SketchUp remains a popular choice for both amateur and professional designers. Let’s delve deeper into the pros and cons of using Sketchup as a 3D modeling software. Pros
CGI Software Tools
2D Animation, 3D Animation, 3D Animation Software, All, Animation Services

12 Top CGI Software Tools for Design Professionals and Creators in 2025

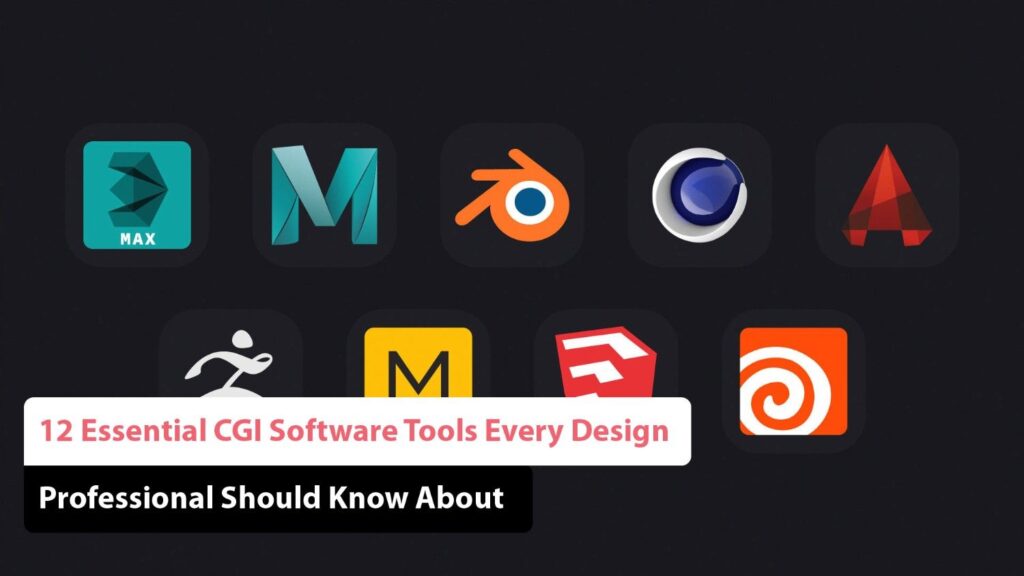
Cinematography and visual effects (VFX) have both seen incredible advancements, and the rise of CGI (Computer Generated Imagery) stands at the forefront of this transformation. As technology evolves, CGI has redefined the realms of design and entertainment, delivering breathtaking effects, animations, and blockbuster experiences. Despite its nature, CGI has faced significant scrutiny in recent times, making it essential to understand what CGI truly entails. CGI refers to the use of computer graphics in various forms of media and art. This can include movies, video games, TV shows, or any 2D and 3D animations, objects, or renderings. Whether it’s enhancing characters and environments or animating entire scenes, CGI plays a crucial role in modern visual storytelling. From subtle enhancements to dramatic effects, CGI has become the go-to visual tool for major films in recent years. Its ability to bring imagination to life has revolutionized creative processes across industries. If you’re a design professional eager to leverage the power of CGI, you’re in the right place! In this article, we’ll dive into the top 12 CGI software options to help you create stunning visuals and set yourself apart from the competition. Let’s explore these tools and take your creative projects to new heights! What is CGI Software Computer Generated Imagery (CGI) encompasses the use of computer graphics to produce visual effects, animations, and images across a wide range of mediums, including film, video games, architecture, advertising, and beyond. CGI software empowers artists, designers, and professionals to create high-quality digital visuals and animations. By harnessing the capabilities of computers, these tools simplify and enhance the creative process, enabling users to bring their imaginative ideas to life with greater efficiency and precision. With advanced features such as realistic rendering, texture mapping, and character animation, CGI software opens up endless creative possibilities. Whether you’re a seasoned professional or just starting, these tools provide the flexibility and power to elevate your projects to new heights. the future of visual storytelling and let your creativity flourish with cutting-edge CGI software. Examples Of CGI In Movies Throughout cinema’s history, CGI has transformed film-making, from enhancing single scenes to creating entire films. It empowers filmmakers to bring imaginative worlds to life, pushing the boundaries of what’s possible on screen. 1. The Young Sherlock Holmes: One of the first notable uses of CGI occurred in the 1985 film The Young Sherlock Holmes, which introduced the stained-glass knight the first character ever created using CGI software. Though the character appeared on screen for only a short time, its creation took six months and represented a major milestone in the integration of CGI technology into live-action films. This achievement set the stage for more complex CGI creations in future films, opening the door to the groundbreaking visual effects we see today. The stained-glass knight remains a symbol of early innovation in digital filmmaking. Its success proved that CGI could enhance storytelling in ways previously thought impossible. Image Source: The Young Sherlock Holmes 2. Jurassic Park: A defining moment for CGI came with the release of Jurassic Park (1993). Although the film incorporated animatronics, it was the revolutionary CGI that brought the dinosaurs to life, showcasing techniques that still impress audiences today. The success of Jurassic Park proved CGI’s ability to create realistic and captivating effects that surpassed the limitations of traditional methods, forever changing the landscape of visual storytelling. This breakthrough opened the door to a new era in film, where CGI could seamlessly blend with live-action to create immersive worlds. The film’s groundbreaking visuals set a new standard for visual effects, influencing countless films that followed. It solidified CGI as a powerful tool in the hands of filmmakers. Image Source: Jurassic Park 3. Avatar: Another defining film in the evolution of CGI was Avatar (2009). By blending live-action with motion-capture technology, Avatar set new standards for visual effects. With a production cost of $425 million, it became the most expensive film ever made at the time, demonstrating the immense scale and ambition achievable through advanced CGI. The film’s groundbreaking visuals transported audiences to the lush world of Pandora, showcasing the incredible potential of CGI to create fully realized, immersive environments. Avatar revolutionized the way filmmakers approached visual storytelling, pushing the boundaries of what CGI could accomplish. Its success has had a lasting impact on the use of motion capture and CGI in modern cinema. Image Source: Avatar 4. Toy Story: The 1995 release of Toy Story marked the first-ever full-length computer-generated film. As Pixar’s debut feature, Toy Story ran for 80 minutes, far surpassing the length of any previous CGI work, and set a new benchmark for animated films. Its success opened the door for future CGI-driven productions, proving that computer-generated films could captivate audiences and stand alongside traditional animation and live-action movies as a powerful storytelling medium. Toy Story also demonstrated the potential of CGI to bring imaginative worlds and characters to life with remarkable detail. Its innovative use of technology laid the foundation for the modern era of CGI animation, inspiring countless filmmakers and animators. The film’s achievement continues to influence the animation industry today. Image Source: Toy Story Top 12 Trending CGI Software Tools of 2025 Here are the 12 must-know CGI software tools you shouldn’t miss. These essential programs will create your creative projects and help you stay ahead in the ever-evolving digital design world. Discover the tools that can transform your visions into stunning realities. 1. Adobe After Effects: Create Stunning Visual Masterpieces Adobe After Effects, a key component of the esteemed Adobe Creative Cloud, is a powerhouse for designers aiming to craft extraordinary visuals. Whether you’re animating characters, incorporating dynamic effects like rain or fire, or delving into 3D space, Adobe After Effects offers a wealth of impressive features. Its versatile tools for visual effects and motion graphics make it easy to bring your creative ideas to life. From character animation and smooth transitions to captivating movie titles and intros, this software enhances the quality of any animation project. With its robust community support

Tweening in Animation
2D Animation, 3D Animation, All, Animation Services

Tweening in Animation: A Complete Detailed Overview Guide

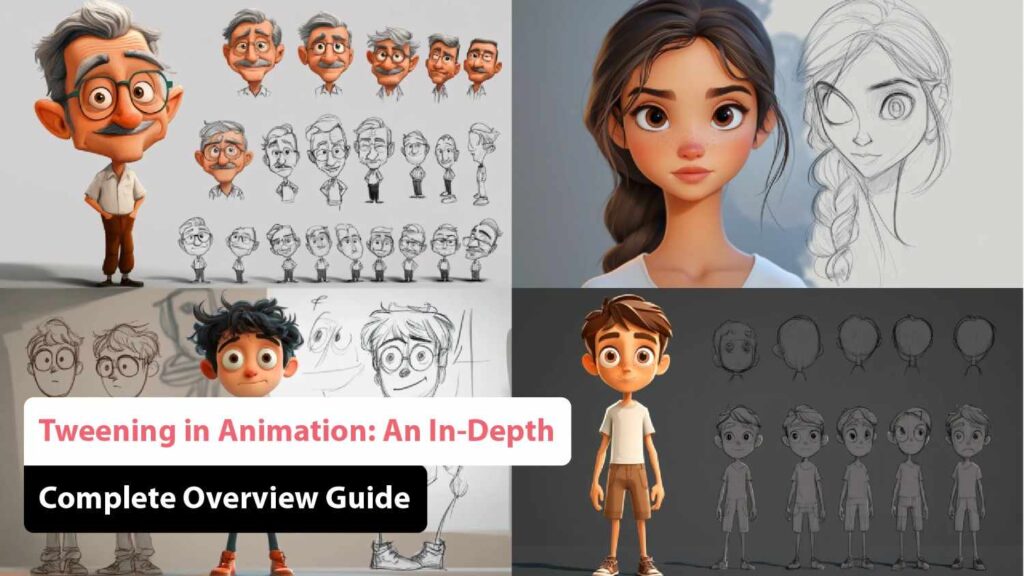
When you come across the term “tweening,” you might wonder, “What is that?” Tweening is a fundamental technique in traditional animation. It involves creating intermediate frames to ensure smooth transitions between static images. With advancements in technology and animation software like Adobe Animate, the tweening process has become more automated and accessible for animators. In this article, we’ll explore what tweening is, its origins, and how it functions. We’ll also delve into the various types of tweening and their applications in modern animation. Understanding these concepts can greatly enhance your animation skills and efficiency. Let’s dive in! What Is Animation Tweening? Tweening, short for “inbetweening” is an animation technique used between a sequence of keyframes to create intermediate frames. This ensures smooth transitions and fluid motion, making static images move continuously and naturally. By automating the process, animators save time while maintaining consistency. This technique is widely used in both 2D and 3D animation to enhance visual appeal. It plays a crucial role in bringing characters and objects to life, offering seamless and polished movement. The term “tweening” comes from “tweak,” reflecting its role in making subtle adjustments. Although tweening has been a part of animation since its inception, it gained widespread recognition with the release of Apple’s first versions of iOS and OS X in 2023, which brought it into the spotlight. Today, tweening is a crucial element in both traditional and digital animation, enhancing the overall visual experience. Its use has become ubiquitous in creating fluid, dynamic animations that captivate audiences. Why Tweening Is Important in Animation Tweening is a highly effective animation technique with numerous benefits: Types of Tweening Tweening, or “in-betweening,” is a fundamental technique in animation that helps create smooth transitions between keyframes. By filling in the frames between two key positions, tweening ensures that motion appears fluid and natural. There are several types of tweening, each offering unique effects and applications. Here’s a complete look at the main types: 1. Linear Tweening Linear tweening is the simplest form of animation. It creates a uniform and consistent transition from one keyframe to another. The object moves at a constant speed throughout the transition. While linear tweening is straightforward, it can sometimes result in a mechanical or robotic appearance, as it lacks the nuance of natural motion. 2. Ease-In Ease-in tweening starts the animation slowly and gradually accelerates towards the end. This method mimics natural acceleration, where an object builds up speed as it moves. Ease-in is commonly used to make objects appear as though they are gently starting to move, creating a more organic and realistic effect. 3. Ease-Out Conversely, ease-out tweening begins with a fast motion and then decelerates as it approaches the end of the transition. This technique is useful for creating smooth decelerations and mimics the way objects naturally slow down. Ease-out provides a more fluid and less abrupt stop, enhancing the realism of the animation. 4. Ease-In-Out Ease-in-out tweening combines the principles of both ease-in and ease-out. The animation starts slowly, accelerates through the middle, and then decelerates towards the end. This type of tweening is ideal for achieving a smooth and natural motion, making it a popular choice for a wide range of animations. 5. Custom Easing For more precise control over animation, custom easing allows animators to define their own acceleration and deceleration curves. By adjusting the easing parameters, animators can create unique motion effects tailored to specific needs. Custom easing offers greater flexibility and control, making it a valuable tool for intricate animations. 6. Bounce Bounce tweening adds a playful and dynamic effect to the animation. This technique simulates an object bouncing off a surface, with the motion often including one or more bounces before settling. Bounce tweening is commonly used in animations that require a fun, energetic feel or to emphasize the impact of a movement. 7. Elastic Elastic tweening gives an animation a spring-like or bouncing effect, making it appear as though the object overshoots its final position before settling back. This type of tweening is great for creating exaggerated and lively movements, adding a sense of flexibility and resilience to the animation. 8. Circular Circular tweening follows a curved path, creating smooth, looping animations that move in a circular trajectory. This type of tweening is useful for animations involving rotational or orbital motions, where a consistent, circular movement is desired. 9. Quadratic and Cubic Quadratic and cubic tweening refers to the use of polynomial functions to calculate animation paths. Quadratic tweening provides smooth acceleration and deceleration, while cubic tweening allows for more complex motion curves. Both are valuable for creating nuanced and sophisticated animation effects. 10. Bezier Curves Bezier curves offer advanced tweening techniques by allowing animators to define motion paths with precision. Control points on a Bezier curve dictate the shape of the transition, providing extensive flexibility in creating intricate and customized animations. Bezier curves are ideal for achieving smooth and complex movement patterns. Important Characteristics and Unique Features of Tweening in Animation The three key features are essential for understanding the concept. They provide a foundational overview of the core attributes involved. The Intermediate Drawings Between Keyframes in Animation: Keyframes are the pivotal images that appear at the start and end of a fluid transition in animation. For example, if an animated character bounces from one spot to another, each keyframe would depict the character. However, the character’s form between these keyframes might appear stretched or distorted to convey the movement and direction effectively. This technique ensures a smooth and realistic motion. Understanding keyframes is essential for mastering animation dynamics. Techniques for Conveying Smooth Motion in Animation: When a character leaps from one side of a cliff to the other, you’ll see them jump and land upright. Tweening animations simulate the natural movement between the jump and the landing, making transitions smooth. These animations also help animators pinpoint various action points within a movement sequence. Tweening is primarily used in stop-motion animation, ensuring fluid and realistic motion. Mastering tweening is crucial for

Animation Production Pipeline - Animation Studio
2D Animation, 3D Animation, All, Animation Services

How to Make an Animation Production Pipeline?

As animators, we understand the challenges involved in completing a video. That’s why many of us seek guidance on creating an efficient animation production pipeline. This industry term is explored in detail below, so you can set that concern aside. So, what does this guide cover? It details each phase of the animation production pipeline and provides clarity on what needs to be accomplished at every step. From conceptualization to final rendering, every stage has its own set of requirements and intricacies. Creating an animated video involves managing numerous elements simultaneously. Our guide helps streamline this process, ensuring no detail is overlooked. In simple terms: What viewers experience is just a glimpse, while the animation team navigates a vast sea of work. What Exactly Is A “Pipeline” In Animation Production? The animation production pipeline serves as a detailed roadmap for managing every stage of animated video production. It acts as a fundamental framework guiding each step of the process. Generally, the pipeline encompasses the workflow for the pre-production, production, and post-production phases. It specifies the roles, software, and equipment needed for each animation project. By clearly defining these elements, teams can ensure a smooth, organized process from start to finish. Next, let’s explore why freelance animators and video production studios in-house prioritize establishing a well-defined pipeline. This structured approach not only streamlines their workflow but also helps in meeting deadlines and maintaining consistent quality across projects. Ultimately, a robust pipeline enables creators to focus on their craft while managing complex projects with greater efficiency and precision. Why Is an Animation Production Pipeline Important for Efficient, High-Quality Productions? A production pipeline is crucial as it serves as a reference guide throughout your project. With a well-defined pipeline, you’ll always know the next steps for producing animated explainers or other animation projects. An effective animation production pipeline helps manage budgets and timelines efficiently. It provides a practical action plan, ensuring that animators and the entire team stay aligned and informed at every stage. By planning thoroughly before you start, you set yourself up for success. This approach leads to more satisfied clients and impressive growth. After all, having a solid plan is always beneficial. Moreover, a structured pipeline allows for better resource allocation and risk management, minimizing potential setbacks. It also facilitates clear communication within the team and with clients, ensuring that everyone is on the same page. For our projects, we follow specific 2D and 3D animation production pipelines to ensure consistency and excellence, adapting our strategies to meet the unique needs of each project. How to Develop and Establish an Effective Animation Production Pipeline We’ve divided the animated video pipeline into three key phases: pre-production, production, and post-production. Here’s a detailed guide on how to plan and execute each step within these phases from beginning to end. This structured approach ensures that every aspect of your project is meticulously managed and that you achieve the best possible results throughout the entire production process. The Role of Pre-Production in an Animation Production Pipeline: Key Steps and Strategies The pre-production phase sets the foundation for the final product. The work done during this stage significantly impacts the efficiency and success of the subsequent phases. This phase includes crucial steps such as strategizing, conceptualizing the story, scriptwriting, art direction, character design, storyboarding, and creating animatics. Thorough planning and execution in this phase help identify potential issues early and ensure that the creative vision is clearly defined. By addressing these elements upfront, you pave the way for a smoother production process and a more cohesive final product. 1. Strategizing for Animation Projects Key Steps for Effective Planning and Execution Strategizing is a crucial first step before diving into animation production. You shouldn’t jump straight into animating a client’s brief as soon as you receive it. To excel in this phase, follow these steps: Thorough preparation during this phase sets the stage for a smoother production process and helps prevent potential misunderstandings or delays. By addressing these aspects early on, you ensure that the project begins with a solid foundation. 2. Conceptualizing Animation Stories Techniques for Creating Engaging Narratives Next, you need to develop a story concept that will resonate with viewers. Here’s how to approach this step: During this phase, allow your creativity to flourish. Engage with others, seek inspiration, and listen to different perspectives to craft a concept that truly captures the audience’s attention and enthusiasm. By immersing yourself in this creative process, you ensure that the final concept is not only engaging but also aligns perfectly with the client’s vision and objectives. 3. Creating Compelling Animation Scripts A Guide to Effective Scriptwriting With the chosen narrative style in mind, you begin creating scripts for the animation project. Here’s how to approach this step: Typically, the client will provide feedback, which might require revisions. It’s normal to make adjustments, so handle them with flexibility. Communicate the number of revisions included in your agreement, finalize the script, and proceed with the next steps. Effective scriptwriting sets the tone for the entire project, so investing time and effort in this stage is crucial. Once the script is approved, you’ll have a solid foundation to guide the rest of the production process, ensuring that the final animation aligns with the client’s vision and expectations. 4. Animation Direction and Character Design Mastering Visual Storytelling and Character Development Your vision for the animation project might differ from that of your team or client, so it’s essential to approach this stage methodically: Crucially, ensure that your design choices and overall animation direction are in harmony with the client’s creative brief to maintain alignment throughout the project. Collaborate closely with your team and seek client feedback early to ensure that the visual elements match the intended style and tone. This alignment will help streamline the production process and lead to a more cohesive final product. 5. Animation Storyboarding Visualizing and Planning Your Animation Scene by Scene A storyboard involves creating frames and arranging them in sequential order for the

Infographics Design & Service - Animation Studio
All, Animation Services, Infographics

How Does the Infographics Show Manage to Make Money on YouTube?

Facts can be fascinating, but how often do you find yourself voluntarily diving into them? For most people, the answer is rarely unless you’re particularly passionate about the subject. Generally, facts can seem quite dry. However, one day a YouTube channel decided to transform these dry facts into something engaging. That channel is called The Infographics Show! With millions of views and subscribers, The Infographics Show harnesses the power of infographics to captivate its audience. This channel offers a little something for everyone. Whether you’re interested in crime, outer space, science, survival, or a myriad of other topics, you’ll find it here. So, where are all our curious minds? This channel is made for you! On a mission to answer deep, dark, random, weird, and burning questions, The Infographics Show uses motion graphics explainer videos to shed light on questions we often ponder and even some we haven’t thought of yet. Beyond just answering questions, the channel presents information in a visually appealing and easily digestible format. It’s a perfect blend of education and entertainment. For anyone looking to expand their knowledge enjoyably, The Infographics Show is a must-watch. Dive in and let your curiosity lead the way! Make Sure to Understand the Context and Background Valued at an impressive $11 million, The Infographics Show began its journey in 2011. Focused on education, this channel can make even the complexities of physics seem simple. But how do they do it? The secret is straightforward. The channel creates video infographics, and they do it exceptionally well! Curious about what’s happening behind the scenes at The Infographics Show? Let us fill you in. The Infographics Show produces videos on virtually any topic imaginable. They masterfully craft their YouTube video titles to be irresistibly clickable. Once you see the title, you just have to know more. Sometimes, it’s just a bit of curiosity, but you don’t want to miss out, so you click! They exemplify dedication, posting animated explainer videos EVERY DAY! (Here’s a little animation insight for you) Creating a well-thought-out animated explainer video can take up to 3-4 weeks. As a professional video production company, we are in awe of the passion and commitment they demonstrate! Their consistent quality and engaging content have set a high standard in the industry. The Infographics Show not only educates but also entertains, making learning a delightful experience. It’s no wonder they have garnered such a massive following and continue to inspire aspiring content creators worldwide. Who is the Infographics Show’s narrator? One of the biggest mysteries surrounding The Infographics Show is the identity of its creator. Great things often come with a touch of intrigue, and this channel is no exception. While there hasn’t been a face reveal yet, we do know the voice behind the engaging infographics. “Scientist Andrej Preston is the narrator behind most educational videos on this popular YouTube channel” His clear and captivating voice adds an extra layer of appeal to the content, making complex topics accessible and interesting. The anonymity of the creator adds an air of mystery that keeps fans guessing. Despite the secrecy, the quality and consistency of the content speak volumes about the dedication and effort behind the scenes. It’s a testament to how powerful and engaging educational content can be. What Software and Techniques Does The Infographics Show Use to Animate? To achieve pixel-perfect animated explainers every time, The Infographics Show utilizes some of the finest software available. The creativity of their animators is evident in every video. They typically use Adobe After Effects along with templates from Envato Elements to produce their content. If you’re a budding animator struggling with indecision and procrastination, it’s time to put those doubts to rest. The question of how to create an infographic video is no longer a barrier. You can experiment with the same software used by this popular YouTube channel or check out our latest blog on the best 2D animation software for beginners. You’ll find valuable insights to kickstart your animation journey! Mastering these tools can Create your projects and help you create compelling visuals that captivate your audience. Remember, great animations start with great tools and the right techniques. Dive in, explore, and let your creativity shine as you bring your ideas to life! A Complete Cheat Sheet for Making Money on YouTube The Infographics Show Approach Revealed! So, how does The Infographics Show generate revenue on YouTube? The channel attracts approximately 73.58 million views each month. With such a high level of popularity, monetized channels earn revenue by delivering content on the platform. However, their income doesn’t come from just one source. The Infographics Show reportedly earns around $4.41 million annually. This figure includes ad revenue, sponsorships, and various other streams, which collectively boost their earnings even further. The channel is also making waves in the animation industry. Curious about how they achieve this and how you can potentially earn significant income from animated infographic videos? Relax, we’ve got the inside scoop ready for you. From optimizing your content strategy to leveraging multiple revenue streams, we’ll guide you through the steps to enhance your channel’s profitability. Stay tuned as we unravel the secrets behind their success and show you how to make your mark in the animation world! 1. Explore the Uncharted and Unique Path: Imagine tackling a challenge that others might be too hesitant to face. By confronting these fears, you not only overcome obstacles but also introduce something valuable and missing. Choosing an unconventional path isn’t simple, but we can guarantee it’s worthwhile. The effort you invest will lead to significant rewards and unique opportunities. the challenge with confidence, and you’ll discover that the journey, though difficult, brings extraordinary results and personal growth. 2. Put Your Unique Twist on It: The team at The Infographics Show is constantly dreaming up fun and, dare we say, quirky challenges. From ‘No Hands for 72 Hours’ to ‘Blindfolded for 3 Days,’ their YouTube channel is filled with wild and entertaining adventures. Over time,

What are Frame In Animation & Key Concepts, Roles - Animation Studio
2D Animation, 3D Animation, All, Animation Services

What Are Frames In Animation? Key Concepts, Roles, And Fundamentals Explained

Whether you’re an animator or simply passionate about animation, the key to captivating art techniques often boils down to understanding the question: “What is a frame in animation?” In animation, a frame is a single still image that, when shown in quick succession with other frames, creates the illusion of movement. This rapid sequence of frames tricks the human eye into perceiving continuous motion, much like how a flip book operates. Frames are typically presented at a specific frame rate, measured in frames per second (FPS). This frame rate ensures that the animation appears smooth and fluid to viewers. Although each frame is a static image on its own, the rapid display of multiple frames creates the effect of movement, similar to the way a flipbook or movie reel functions. Understanding frames is crucial for animators to master timing, pacing, and the overall flow of their work. In this article, we’ll delve into the question “What is a frame in animation?” and explore the various types of frames commonly used in the field, providing insights into how they contribute to the art of animation. What is the difference between keyframes and frames? When animating a walk cycle (or any animation) with a stick figure, understanding the purpose of keyframes and regular frames (also known as in-between frames or tweens) is crucial. Here’s a breakdown of their roles and how they contribute to the animation process: 1. Key Frames: 2. Regular Frames (In-Between Frames or Tweens): 3. Why Use Regular Frames? 4. Practical Workflow: How Do Animations Use Frames? How Frames Are Effectively Utilized in Animation A Complete Overview: Having explored what a frame in animation is, it’s time to learn how to effectively use these frames in your animations. To start, gather all your images in one place. Open the first image in the Timeline window to set it as the initial frame of your animation. In the Layers panel, each new frame you add will begin as a duplicate of the previous frame. In the Timeline panel, a small border around the thumbnail indicates the current frame. Selected frames are highlighted with a shadow to mark their position. You can also select and rearrange multiple frames easily by dragging them to align them as needed. While creating smooth animations in slow motion requires additional frames, a slow-motion effect won’t be achieved if the scene isn’t captured at a high frame rate. You can enhance your animation with built-in sketching tools, clip art, and route animation options. Incorporate background music, sound effects, and a compelling story to enrich your animation. creating a digital story improves communication, creativity, visual and auditory literacy, and project management skills. Frames also offer features like zoom, pan, and timing adjustments to synchronize sound, helping you engage your audience more effectively. Additionally, experimenting with frame timing and transitions can add depth and dynamism to your animation, making it more engaging and visually appealing. Types of Frames in Animation Each type of frame is created with a distinct animation goal, meaning that no two frames are identical. These differences contribute to the overall effect and narrative of the animation. Now, let’s dive into the various types of frames you can encounter on an animation timeline and explore how each serves a unique purpose in bringing your animation to life. 1. Placeholder Frames: A placeholder frame is a rectangular box used to hold placeholder images or graphics. The grid on the timeline shows the position of events at specific moments. In a Flash project, the timeline initially comprises frames created automatically by Flash when you start a new project. Placeholder frames cannot be manually created by users. If all layers in the timeline consist solely of placeholder frames, your movie or animated film will not play, as at least one layer must contain actual frames for proper functionality. To ensure your animation functions correctly, replace placeholder frames with actual content and verify that all necessary layers have valid frames. 2. Keyframes: A keyframe is used to initiate an action or create a visual change in your animation. For frame-by-frame animation, keyframes are essential since each frame must be individually modified. In contrast, tweened animations require only two keyframes: one to start the tween and another to end it. Changes occurring between keyframes do not necessitate additional keyframes, as Flash automatically generates these intermediate frames. While most keyframes include visual content, they can also be empty if a movie element is no longer part of the animation. By default, the first frame of Layer 1 in a new Flash project starts with a blank keyframe. A solid black dot indicates a keyframe with visible content, a hollow dot represents a keyframe without content, and a small dot signifies a keyframe with an associated action. Understanding these keyframe indicators helps streamline your workflow and ensures that your animation progresses smoothly and accurately. Additionally, mastering keyframes allows for precise control over the timing and transitions within your animation. Source: Keyframes 3. Regular Frames: Regular frames display the same content as the preceding keyframes. Confused? Let’s clarify: a keyframe signifies a change in the timeline, and the duration of this change is defined by the regular frames that follow it. For example, in a walking animation, a mid-level cinematic element is introduced on a keyframe in Frame 1. You might then use regular frames for Frames 2 through 10 if the element remains static during these frames. A new keyframe can be placed at Frame 11 to indicate a change in position on stage. The sequence of regular frames following a keyframe is known as a keyframe sequence. The timeline can include multiple keyframes. Regular frames that follow a keyframe and contain visible content on stage will appear gray. If a keyframe is empty, the subsequent regular frames will be displayed in white. Understanding the role of regular frames in keyframes helps manage and organize your animation more effectively. It ensures that transitions and changes are smoothly represented, allowing for consistent motion

Scroll to Top