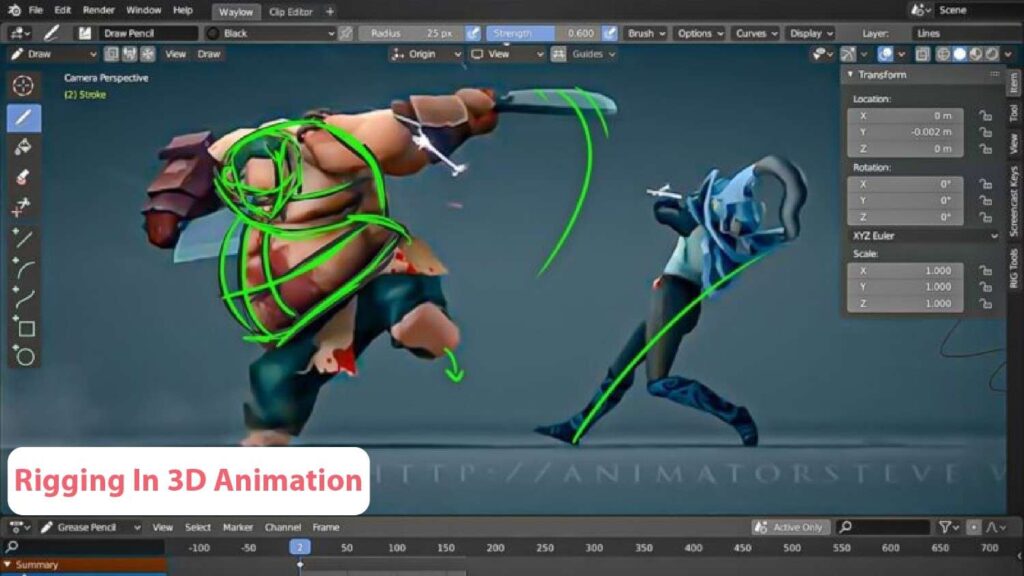
In skeletal animation, rigging involves applying a network of interconnected digital bones to a 3D character model, effectively creating its skeleton. This process enables animators to control the character model as if it were a puppet. As Brian Green, a rigging technical director at Pixar, explains, “Rigging is the process of adding control to a digital model.”
In the ever-evolving world of digital animation, rigging in 3D animation stands out as a pivotal process that breathes life into static 3D models. Whether you’re creating characters for animated films, video games, or VR experiences, rigging provides the essential skeletal structure that enables movement. In 2025, advancements in automation, AI-assisted workflows, and real-time feedback systems are revolutionizing how animators approach this critical stage.
In this comprehensive guide, we’ll explore what is rigging in 3D animation, dive into essential rigging techniques for 3D animation, explain the difference between rigging and skinning in 3D, and provide a step-by-step guide to 3D character rigging using some of the best rigging software for 3D animators. Whether you’re a student, freelancer, or studio professional, this guide is your one-stop resource to master rigging in 2025.
What is Rigging in 3D Animation?
Rigging in 3D animation is the process of creating a skeleton (rig) for a 3D model so that it can move in a realistic and controlled manner. Think of the rig as an internal structure made of bones and joints, which allows the model to bend, twist, and perform actions. Rigging transforms a static mesh into a dynamic character.
A rig consists of:
- Joints/Bones – Act like the bones of the character.
- Controllers – Interfaces that allow animators to manipulate the model.
- Constraints – Rules that determine how joints behave.
- IK/FK (Inverse/Forward Kinematics) – Systems that define how limbs move.
Rigging is crucial in everything from Pixar-style films to AAA games and AR/VR environments.
Best Rigging Software for 3D Animators in 2025
The landscape for 3D software has grown significantly in 2025. Here are the best rigging software for 3D animators this year:
- Autodesk Maya – Still the industry standard, with updated AI-assisted auto-rigging and deformation correction.
- Blender – Open-source and free, Blender’s Rigify add-on and improved bone control systems make it ideal for indie creators.
- Cinema 4D – Excellent for motion graphics and integrates well with character animation pipelines.
- Houdini – Advanced node-based system allows technical animators to build customized rigs.
- Modo – Known for its intuitive interface and procedural rigging systems.
- Unity/Unreal Engine – Increasingly used for real-time animation and now feature robust rigging support.
Each of these tools supports key rigging functionalities including IK/FK blending, weight painting, and animation baking.
Step-by-Step Guide to 3D Character Rigging
Let’s break down the step-by-step guide to 3D character rigging in 2025:
Step 1: Preparing the Model
- Ensure the character’s mesh is clean and symmetrical.
- Apply transformations and freeze the model’s position.
- Remove unnecessary geometry and ensure edge loops support movement areas (joints).
Step 2: Creating the Skeleton
- Add joints starting from the root (usually pelvis).
- Work symmetrically through the spine, arms, and legs.
- Include fingers, toes, and facial joints if needed.
Step 3: Establishing IK and FK Systems
- Create FK chains for limbs to allow rotation-based animation.
- Implement IK chains to allow end-point movement (hand or foot positioning).
- Blend both systems for full control.
Step 4: Adding Controllers
- Place control objects for each joint or section.
- Connect controls via constraints (orient, parent, point).
- Set up custom attributes for facial expressions or finger curls.
Step 5: Skinning the Model
- Bind the mesh to the skeleton.
- Weight paint vertices to determine bone influence.
- Test deformations and adjust for natural bending.
Step 6: Testing and Final Adjustments
- Animate basic poses to see if the rig deforms correctly.
- Refine weight maps, controller limits, and secondary motion.
- Lock and hide unnecessary channels.
Difference Between Rigging and Skinning in 3D
Understanding the difference between rigging and skinning in 3D is essential:
- Rigging involves creating the skeleton and control systems for movement.
- Skinning is the process of binding the character mesh to the skeleton so that the geometry deforms as joints move.
In simple terms, rigging gives your model the ability to move, while skinning makes sure it moves correctly.
Essential Rigging Techniques for 3D Animation
Here are the essential rigging techniques for 3D animation that every animator must master in 2025:
1. Modular Rigging
Break your rig into modules—spine, limbs, facial controls for reuse and efficiency.
2. Advanced Constraints
Use point, orient, and aim constraints to create natural motion and better control.
3. IK/FK Switching
Allow seamless blending between Inverse Kinematics and Forward Kinematics for dynamic animation.
4. Spline IK
Used for flexible parts like tails, tentacles, or spines.
5. Joint Orientation
Proper orientation ensures smooth rotations and predictable behavior.
6. Secondary Motion Controls
Add features like jiggle bones, squash and stretch, and auto clavicle for realism.
7. Facial Rigging
Use blend shapes or joint-based setups for expressive facial animation.
How to Rig a Character for 3D Animation
So now that you’ve read the fundamentals, here’s a simplified roadmap for how to rig a character for 3D animation:
- Plan Your Rig – Study the character’s movement needs.
- Build the Skeleton – Use symmetry and anatomical structure.
- Create Controls – Give animators intuitive ways to manipulate joints.
- Skin the Mesh – Weight paint for realistic deformation.
- Add Attributes – Set up sliders and custom UI for ease of use.
- Test and Refine – Fix weight issues, check joint behavior, and polish.
Today’s rigging process is not just about technical skill but also artistic finesse. A well-rigged character is invisible the audience sees only smooth, believable movement.
Automation and AI in Rigging in 2025
With the rise of AI, rigging has become faster and more accessible. Here’s how AI is impacting rigging workflows:
- Auto-Rigging Tools: Tools like Adobe Mixamo and Ziva Dynamics offer AI-assisted rigging.
- Machine Learning Models: These predict joint placements and optimize weights.
- AI-Based Retargeting: Automatically transfer rigs or animations to different characters.
- Error Detection Systems: AI flags rigging issues during production.
These innovations are saving time, reducing manual labor, and empowering smaller teams to achieve professional-level results.
Common Mistakes to Avoid When Rigging
Even in 2025, these mistakes can derail your rigging project:
- Incorrect Joint Orientation: Causes erratic animation behavior.
- Poor Weight Painting: Leads to unnatural deformation.
- Overly Complex Rigs: Makes animation tedious.
- Not Testing the Rig: Always validate with motion tests.
Conclusion
Rigging in 2025 continues to be an essential, transformative part of the 3D animation pipeline. From gaming to film to AR, a well-constructed rig enables fluid, lifelike motion. By mastering the step-by-step guide to 3D character rigging, understanding the difference between rigging and skinning in 3D, and using the best rigging software for 3D animators, you’re on the path to creating dynamic and expressive digital characters.
Whether you’re a beginner or a seasoned professional, keep refining your skills, stay updated with the latest tools, and don’t shy away from experimenting with AI-driven techniques.
Frequently Asked Questions (FAQ’s)
What is rigging in 3D animation?
Rigging is the process of constructing a digital skeleton for a 3D model, which consists of interconnected bones or joints. These bones act as the internal framework that gives structure to the model, allowing it to be animated. By manipulating these bones, animators can control the movement, expression, and overall behavior of the model. Rigging is essential for bringing static 3D models to life, enabling them to move in realistic and fluid ways.
Why is rigging important in 3D animation?
Rigging is a fundamental aspect of 3D animation because it provides the necessary controls for animators to create complex and believable character movements. Without rigging, a 3D model would remain static and unresponsive, unable to perform any actions or express emotions. Rigging allows for the articulation of the model’s limbs, facial expressions, and other dynamic elements, making it possible to animate scenes that require detailed and intricate movements. The quality of the rig directly impacts the fluidity and realism of the final animation, making it a crucial step in the production pipeline.
Can rigging be applied to any 3D object?
Yes, rigging can be applied to almost any 3D object, not just characters. While it is most commonly associated with character animation, rigging is also used for a wide range of other objects, including vehicles, props, machinery, and even organic elements like plants. For example, a vehicle might be rigged to have a steering mechanism, rotating wheels, and moving suspension components. Similarly, props like chairs can be rigged to allow for natural movements, such as rocking or swiveling. The versatility of rigging makes it an invaluable tool in the animation process, enabling animators to bring any object to life with dynamic movement.
What are the key steps involved in the rigging process?
The rigging process is composed of several key steps, each essential to creating a functional and effective rig:
- Skinning: This initial step involves creating and attaching a network of bones and joints to the 3D model’s mesh, which is the model’s surface or skin. The bones act as the armature that will drive the model’s movements. Proper skinning ensures that the mesh deforms correctly when the bones are moved, maintaining the model’s intended shape and proportions.
- Building Controllers: Controllers are added to the rig to manage the movement of the bones. These controllers are typically represented by geometric shapes, such as diamonds, cubes, or spheres, that animators can manipulate to pose the model.
- Weight Painting: In this step, weight values are assigned to different parts of the model, determining how much each bone influences the surrounding mesh. This process is crucial for achieving realistic deformations, as it allows for smooth transitions between different parts of the model during movement.
- Forward and Inverse Kinematics: Forward Kinematics (FK) and Inverse Kinematics (IK) are techniques used to control the movement of the model’s bones. FK involves manipulating the bones in a top-down hierarchy, where moving a bone higher up the chain (such as the shoulder) affects the bones lower down (such as the arm and hand).
What software is commonly used for rigging in 3D animation?
There are several software programs commonly used for rigging in 3D animation, each offering a range of features and tools tailored to different needs:
- Maya: One of the most popular and widely used software in the industry, Maya offers a comprehensive suite of rigging tools that allow for the creation of complex rigs. Its robust set of features makes it the go-to choice for many professional animators and studios.
- Blender: A free and open-source 3D modeling and animation software, Blender provides powerful rigging tools that rival those of commercial programs. It is a popular choice among independent artists and small studios.
- 3Ds Max: Another industry-standard software, 3Ds Max is known for its versatility and ease of use. It is often used in game development and architectural visualization, as well as character rigging.
- Modo: Modo offers a user-friendly interface and a strong set of rigging tools, making it a great option for artists who prefer an intuitive workflow.
- ZBrush: Primarily known for its sculpting capabilities, ZBrush also offers rigging tools that allow artists to pose and animate their high-resolution models.
- Cinema 4D: Cinema 4D is favored for its ease of use and is often used in motion graphics, where rigging simple characters and objects is required.
- Houdini: Houdini is known for its procedural rigging capabilities, allowing for the creation of highly customizable and reusable rigs. It is often used in visual effects and complex simulations.