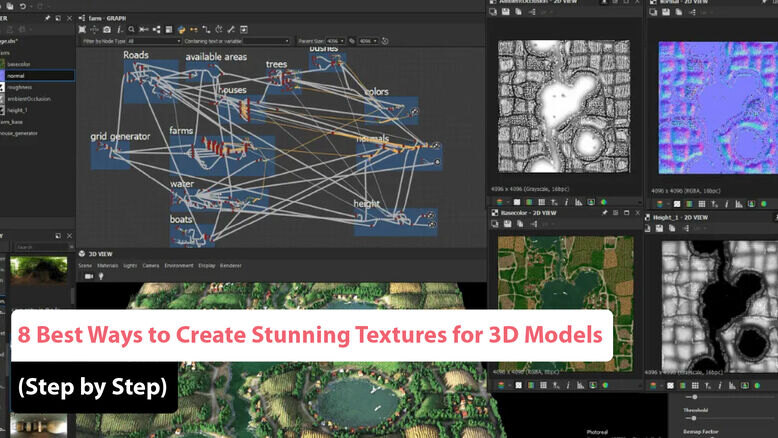
8 Best Ways to Create Stunning Textures for 3D Models (Step by Step)

Textures for 3D Models

Contrary to common perception, creating textures for 3D models is often simpler than it seems. While paying attention to detail is crucial, achieving high-quality results involves various approaches. You can utilize multiple techniques to generate 3D textures with modeling software. Additionally, 2D applications like Photoshop and GIMP can be incredibly beneficial, even if you’re facing some limitations.

Furthermore, you can leverage real-world images and drawings alongside 2D tools when your creativity feels constrained. Let’s delve into the diverse methods for creating textures for your 3D models.

From using procedural textures to hand-painting details, the possibilities are vast. Experimenting with layering techniques can also enhance the depth and richness of your designs. Remember, the right combination of tools and techniques can create your textures to a professional level. your creativity, and don’t hesitate to explore new ideas to make your 3D models stand out.

What is Texturing?

Texturing is the technique of adding detail, color, and texture to 3D models, transforming them into realistic and credible objects. This process involves applying 2D images to the surfaces of 3D shapes, providing them with a rich and textured appearance.

3D texturing enhances the realism and lifelike quality of an object by incorporating colors, patterns, bumps, and other characteristics. Whether it’s a brick wall, a wooden table, or a shiny glass window, the objective is to faithfully replicate the color and surface attributes of the reference object, ensuring it appears natural.

Effective texturing is crucial in creating immersive environments in games and films, as it influences how viewers perceive objects. Advanced techniques like bump mapping and normal mapping further enrich the textural detail, allowing for more dynamic surfaces. By mastering texturing, artists can breathe life into their 3D models, making them not just visually appealing but also believable and engaging.

To better understand the concept of texturing, envision it as a sculpture made from a simple texture drawing, where pixels serve as a substitute for traditional paint, and interconnected dots come together to form the object.

3D Texturing Workflow Breakdown: A Step-by-Step Process

Each animation studio or 3D artist may follow a unique workflow to achieve similar outcomes. At Animotions Studio, our typical 3D texturing workflow is as follows:

StepDescriptionTools/Techniques
1. UnwrappingTexture mapping involves adding color, surface details, and visual properties to a 3D model and defining how light interacts with the surface. Common maps include Base Color, Normal, Height, Specular, Roughness, and Self-Illumination maps.Autodesk Maya, UV mapping tools, Procedural Textures
2. Texture Painting and ShadingPhotoshop, Substance Painter, Specular, Normal, and Height mapsPhotoshop, Substance Painter, Specular, Normal, Height maps
3. Lighting & RenderingThe rendering process calculates the maps assigned to the object’s shader and the lights, affecting the final visual appearance. Texturing and lighting must align with the render engine’s requirements.Render engines (e.g., V-Ray, Arnold), lighting techniques, shader settings
4. Texture MappingA method for defining high-frequency detail, surface texture, or color information on a 3D model, pioneered by Edwin Catmull in 1974.Texture maps (e.g., Ambient occlusion, Metalness, Displacement), UV mapping techniques

Best 8 Ways How to Make Texturing for 3D Models

Texturing is a crucial aspect of 3D modeling that enhances realism and visual appeal. Here are the best eight methods to effectively create textures for your 3D models:

1. Create with Photoshop:

UV mapping for a 3D model plays a crucial role in texture creation. Utilizing Photoshop, one of the top tools for developing textures for 3D models, allows you to produce impressive 2D graphics. It offers a wide array of brushes and options for crafting detailed textures, making the development process straightforward and efficient.

For instance, consider the original character (OC) of Khoa Viet, an exceptional artwork crafted using Photoshop. Here are the specifics of the creation:

  • Sculpting: Blockin, High Zbrush, and 3D Max.
  • Topology/UVs: 3D Max and RizomUV.
  • Texturing: Substance Painter and Photoshop.
  • Integration/Rendering: Marmoset Toolbag.
  • Posing/Animation: Maya.

This project exemplifies the seamless integration of various software, showcasing how each tool contributes to the outcome. Such collaborative efforts can create your 3D modeling skills, allowing you to achieve professional-quality results.

OC of Khoa Viet 3D Texturing

Source: Art Station – Lola Serre

2. Create Using Blender:

Using Blender for texture application is an excellent approach to enhancing 3D models. By exporting your 3D models into Blender, you can easily create textures and utilize Blender’s node system for more advanced texture generation.

Consider Metal Sonic, a 3D model created with Blender. Here are the specifics of the project:

  • Modeling: 3D Max.
  • Texturing: Blender and Substance Painter.
  • Composition: Blender, Photoshop, and After Effects.

This showcases how Blender’s versatility can significantly improve your texturing workflow, making it a valuable tool in any 3D artist’s arsenal. Leveraging its robust features can lead to stunning results that create your projects, allowing you to bring your creative vision to life with precision and detail.

Metal Sonic 3D Texturing

Source: Art Station – Jonathan Truong

3. Procedural 3D Texturing:

Essentially, procedural texturing relies on mathematical algorithms to create textures dynamically. This method is often the most lightweight option since it eliminates the need to store actual images. With the built-in node system in your software, you can easily create procedural textures. Additionally, you can enhance this process by installing external extensions.

For example, consider Pack Rat Piggy, a prop character featuring dynamic characteristics. Here are the details of its creation:

  • Character Model & Props: ZBrush
  • Retopology and UVs: Maya
  • Clothing Patterns: Houdini
  • Animation: Mixamo and KineFX
  • Procedural Texture: Substance Painter

This approach demonstrates how procedural texturing can add depth and detail to your models while optimizing workflow efficiency. By utilizing procedural techniques, artists can achieve a high level of customization and adaptability, ensuring that each project meets unique artistic needs and enhances overall creativity.

Pack Rat Piggy 3D Texturing

Source: Art Station – Clover Lloyd

4. With Real-Life Photographs:

Using actual images can help you create stunning textures for your 3D models. For example, by photographing a wood surface, you can generate a realistic wood texture for your model. Modern 3D tools allow you to utilize real-life textures to achieve lifelike surfaces, but it’s essential to capture the right images of the surfaces you wish to replicate.

Start by examining the surface of your 3D object. A great example of this technique is Bottles of Life, an artwork crafted using a combination of Substance Painter and Digital Lighting. Here are the details of the process:

  • Gathering References
  • Shapes & Blocks: Maya
  • Lighting: V-Ray Rec Light
  • Textures: Substance Painter
  • Web Spiders: Modeling with surface curves and textures using an opacity map
  • Final Touches: 3D application

This method demonstrates how integrating real-world textures can enhance your artistic projects and create the realism of your 3D creations. By effectively using photographic references, artists can achieve a new level of detail and authenticity, making their models truly stand out in any project.

Bottles of Lifes 3D Texturing

Source: Evermotion

5. Use Hand Drawings:

You can also hand-paint directly onto your 3D models. Start by creating a hand-drawn painting on paper, which you will then scan into your computer. Once scanned, import the image into your 3D software, where you can position it using UV mapping, similar to how you would with photographs.

Using advanced tools in 3D texture software like Blender, you can paint textures onto your 3D objects with precision. Take advantage of these features to accurately design your models. Keep in mind that the quality of your hand-drawn artwork will significantly impact the realism of your products. A great example of this technique can be seen in House of Fairy.

This method allows artists to inject a unique, personal touch into their creations, enhancing the overall aesthetic and storytelling aspect of their work. By blending traditional art techniques with modern technology, you can create captivating visuals that resonate with audiences. Additionally, hand-painted textures can add depth and character, making your models stand out in a competitive landscape.

House of Fairy 3D Texturing

Source: Art Station – OKU

6. Substance Designer:

Substance 3D Designer is a powerful software tool designed for creating 2D textures, materials, filters, and 3D models through a user-friendly visual interface that connects elements using nodes. It focuses on procedural and flexible texture generation, allowing you to make adjustments without compromising the integrity of the original work.

For instance, consider the Procedural Village Maker, a 3D model of a farm created with Substance Designer. By applying a grass texture, incorporating a forest texture, and utilizing appropriate lighting techniques to enhance the river and ocean, you can achieve a more realistic and detailed depiction of the farm.

This software not only streamlines the texturing process but also empowers artists to explore their creativity without limitations. With its extensive library of materials and customizable options, Substance 3D Designer is an invaluable resource for anyone looking to create 3D modeling projects. this tool can lead to stunning visual outcomes that captivate and engage audiences.

 Procedural Village Maker

Source: Art Station – Emrecan Cubukcu

7. Photogrammetry:

Photogrammetry is a technique that involves capturing multiple photographs of an object from various angles and combining them to create a 3D model. Specialized software analyzes these images and employs advanced computer algorithms to convert them into a digital 3D representation.

For instance, if you want to create a 3D model of Just a Gecko, you would take several photos of the gecko from different angles, ensuring that the images have overlapping sections. Here are some additional details about Just a Gecko:

  • Sculpted: ZBrush
  • Textured: Substance 3D Painter

This innovative approach allows for incredible detail and accuracy, making it a popular choice among artists and designers. By harnessing the power of photogrammetry, you can bring real-world objects into the digital realm with astonishing realism. This technique opens up endless possibilities for 3D modeling, whether for gaming, animation, or product visualization.

Just a gecko 3D Texturing

Source: Art Station – Pablo Munoz Gomez

8. Substance Painter:

Substance Painter 3D is a software specifically designed for texture painting and adding textures to 3D models. The process involves several steps, including creating textures from photographs or starting from scratch, applying these textures to the 3D objects, setting up appropriate lighting to enhance the scene, and adding final detailing touches.

A great example of this is La Catrina 2020, which was textured using Substance Painter to achieve a more realistic and visually appealing appearance. Here are the details for La Catrina 2020:

  • Texturing: Substance Painter
  • Rendered: VRay
  • Sculpting and Modeling: ZBrush and Maya

Substance Painter offers an intuitive interface that allows artists to paint directly onto 3D models, providing instant feedback and creative flexibility. Its powerful tools enable the creation of complex textures that enhance the overall aesthetic of any project. By utilizing this software, artists can elevate their work, ensuring each model stands out with high-quality, detailed textures that captivate audiences.

La Catrina 3D Texturing

Source: Art Station – Ernesto Ruiz Velasco

Types of 3D Texturing

3D texturing is a crucial aspect of 3D modeling that involves applying surface details to 3D objects. These textures add realism and depth, enhancing the visual appeal of models in various applications, from video games to movies. Here’s a look at the primary types of 3D texturing.

Texturing Techniques in 3D Modeling:

1. Solid Texturing:

Solid texturing is a technique that focuses on creating textures for the surfaces of 3D objects within a three-dimensional environment. Unlike traditional methods that layer 2D textures, this approach modifies color variations at specific points on the model. This enables dynamic color and gloss changes based on the positioning of the texture map. Solid texturing enhances the realism of 3D models, making them more visually appealing. It is especially useful for creating complex materials like metals and fabrics.

2. Geometric Texturing:

Geometric texturing involves applying authentic images directly onto the surface of a 3D object. This method not only allows for texture adjustment but also enables alterations to the shape of the object’s surface. By using photographs, 3D character designers can significantly enhance the visual appeal of their models and modify the object’s form as required. This technique facilitates creative freedom, enabling designers to seamlessly integrate real-world elements into their models. It’s ideal for creating intricate details that elevate the overall design.

3. Static Texturing:

Static texturing is the process of applying a 2D texture onto an existing 3D object. These textures consist solely of information regarding the texture image itself, lacking any dynamic variations or surface alterations. In contrast to other methods, static textures impose a fixed appearance on the object, without modifying its visual characteristics. While simpler than other techniques, static texturing is effective for certain styles and can provide a clean, polished look. It works well in applications where uniformity is desired, such as in architectural visualizations.

4. Surface Texturing:

Surface texturing is a technique that enhances the details on the surface of a 3D model. This process can be resource-intensive and time-consuming, as it often requires a higher polygon count and a robust computer system. Many popular 3D modeling software applications offer advanced features for surface texturing. The 3D texturing process includes creating textures, applying them to models, adding lighting effects, and refining the final details. Investing time in surface texturing can yield strikingly detailed and realistic results, enhancing the overall quality of the final render. It’s a crucial step in achieving lifelike models that engage viewers effectively.

The Best Software for Creating Amazing Textures

Blender is renowned as a powerful tool for creating distinctive textures for 3D models. Its user-friendly interface and extensive features simplify the texturing process, making it accessible for both beginners and experienced artists. One of its standout capabilities is UV unwrapping, which facilitates the mapping of a model’s surface. Additionally, Blender supports texture animation, enhances detail, provides rendering options for realistic visualization, and enables precise 3D texture mapping for accurate texture placement. With Blender’s robust capabilities, artists can bring their creative visions to life, pushing the boundaries of 3D design. Its versatility allows for experimentation, ensuring every project stands out with unique textures.

For those looking to maximize their use of Blender alongside Photoshop, Adobe offers comprehensive documentation on 3D texture painting in Photoshop. After creating your desired 3D texture map, you can easily download it and apply it to your model in Blender. This integration streamlines the workflow, allowing for seamless collaboration between the two powerful platforms. both tools equip designers with an unparalleled toolkit for creating stunning visuals.

Tips for Texturing Different 3D Model Types

Texturing is a crucial aspect of 3D modeling that adds depth and realism to your creations. This guide offers essential tips tailored for various types of 3D models, including characters, environments, and products.

1. Character Texturing:

Creating realistic 3D characters is an exhilarating aspect of the digital landscape, requiring meticulous attention to detail in texturing to ensure these characters appear lifelike.

  1. Head Texturing: When it comes to texturing the hair of a 3D character, precision is key. For instance, consider the hair on a 3D anime model. It should be smooth and natural, mimicking the look and feel of real hair, which enhances its believability in a virtual environment. Techniques such as particle systems or hair cards can be employed to add realism, allowing for dynamic movement that reflects light in a way that mimics natural hair behavior.
  2. Face Texturing: The face serves as the canvas for emotions and expressions. We utilize UV mapping to ensure our 3D model’s face is both symmetrical and realistic. This technique allows us to divide the face into distinct sections, aiding in achieving uniformity in the mouth, nose, and eyes, ensuring they share the same size, depth, and shape, particularly in anime character concept art. Adding subtle details like freckles, blush, or unique facial markings can significantly enhance personality and individuality, making characters more relatable.
  3. Skin Texturing: The skin of our 3D character requires special consideration to achieve a genuine appearance. By adding texture and intricate details, we can create a realistic look. This involves incorporating subtle variations, roughness, and the right color tones. Consider exploring 3D skin modeling ideas, such as adding birthmarks or scars, to add interest and realism. Utilizing techniques like subsurface scattering can also help simulate how light interacts with skin, further enhancing the lifelike quality of the character.

2. Animal Texturing:

Bringing animals to life in 3D modeling hinges on effective texturing. Here are some useful strategies for crafting captivating textures tailored to the unique traits of various animals.

  1. Gather References: Each animal possesses distinct features and textures, making reference materials essential for accurately capturing their essence. For example, reptiles typically exhibit scaly skin, mammals can have either thick fur or short hair, and some may feature bare skin. It’s beneficial to gather high-quality photographs or illustrations that showcase these characteristics in various lighting conditions to better understand how textures behave.
  2. Create Specific Layers: Achieving the desired texture requires the creation of distinct layers for each animal type. For instance, the texture of an elephant should appear rough and devoid of shiny highlights, while a snake or alligator should have a smooth texture that reflects light. Tailoring these layers to the specific characteristics of the animal enhances the realism of your 3D model. Employing different materials and shaders for different parts of the animal can also contribute to a more authentic appearance, such as varying the reflectivity of fur versus scales.
  3. Play with Details: To make your textured animal model stand out, incorporate details that reflect their unique traits. For example, think about the distinctive patterns of a zebra’s fur or the spots on a leopard. These nuances add authenticity and visual appeal to your 3D creature. Furthermore, consider including environmental elements, such as dirt or wetness on the fur, to enhance realism and context within your scene.

3. Asset Texturing:

In the realm of digital creation, various pre-made assets, such as objects, characters, and animals, play crucial roles in enriching a digital environment. Here are key considerations for texturing objects and props:

  1. Function and Decoration: Assets serve multiple purposes some are functional, while others are decorative. Understanding each asset’s role within the scene is vital. For instance, an object meant for background placement might not require intricate details visible only at close range. However, key props that interact with characters or the environment should be texturally rich to engage the viewer and support the narrative.
  2. Distance and Perspective: When texturing, consider the asset’s distance from the camera. Assets positioned closer to the viewer demand more detail and realism, while those in the background can be less detailed, as they won’t be the focal point. Utilizing techniques like LOD (Level of Detail) can help manage performance while maintaining visual quality across various distances.
  3. Lighting Harmony: Effective texturing also involves harmonizing with the overall lighting of the scene. By aligning the texturing style and conditions with the lighting, we can ensure that the asset integrates seamlessly into any environment. Consider how light interacts with materials, as different surfaces (metal, wood, fabric) will reflect and absorb light differently. This understanding will help create assets that not only look good but also feel coherent within the scene.

Final Thoughts

Texturing is an aspect of 3D modeling that significantly enhances the realism and visual appeal of digital creations. Through various techniques from hand-painting and procedural methods to using real-life photographs artists can achieve stunning textures that breathe life into their models. By mastering tools like Blender, Substance Painter, and Photoshop, along with a deep understanding of different texturing types, artists can develop immersive and captivating visuals.

The right texture not only adds detail but also evokes emotion and tells a story, making it essential for character modeling, environmental design, and product visualization. As you explore the diverse methods available for creating textures, remember that experimentation and creativity are key to unlocking your full potential. Whether you’re working on a character for a video game or designing an intricate scene for a film, investing time in the texturing process will undoubtedly bring your work to a professional level.

the artistic journey of texturing, and don’t hesitate to push the boundaries of your creativity. With the right techniques and tools, you can transform your 3D models into visually striking and believable objects that captivate audiences and bring your artistic vision to life.

Frequently Asked Questions (FAQ’s)

How to Make Textures for 3D Models?

Creating textures for 3D models involves several steps:

  1. Gather Reference Materials: Before starting, collect reference images to understand how your model should look and the textures you want to replicate.
  2. Choose Your Method:
    • Photographic Texturing: Take high-quality photographs of real-world surfaces. Use these images as textures.
    • Procedural Texturing: Use software to create textures from scratch, utilizing mathematical formulas to generate patterns and colors.
    • Hand-Painting Textures: Create custom textures by painting directly on the model using 2D painting software like Adobe Photoshop or 3D painting tools like Substance Painter.
  3. Unwrap UVs: Before applying textures, you need to unwrap the model’s UVs, which translates the 3D surface onto a 2D plane. This allows you to accurately map your textures onto the model.
  4. Texture Creation:
    • Use painting software to create texture maps (diffuse, normal, specular, etc.).
    • Diffuse Map: Base color of the texture.
    • Normal Map: Adds surface detail without increasing polygon count.
    • Specular Map: Controls the shininess of the surface.
  5. Apply Textures: Import the texture maps into your 3D software and apply them to your model. Adjust settings as necessary to achieve the desired appearance.
  6. Test and Iterate: Render the model with the applied textures to see how they look in different lighting conditions. Adjust as needed.

What are some common 3D texturing techniques?

3D texturing is crucial for representing three key aspects of any surface in a 3D environment:

  1. Material: The texture conveys the material properties of an object in a 3D world. The main goal of 3D texturing is to give viewers a sense of what the object is made of just by looking at it.
  2. Light Interaction: In reality, objects respond uniquely to light, reflecting properties like reflection, refraction, and anisotropy. These qualities must be replicated in 3D to maintain material authenticity in the animated environment.
  3. Tertiary Details: Creating every tiny surface detail in the modeling phase would overwhelm both software and artists. Texturing solves this by adding fine details—like wrinkles, scars, cracks, and bumps—without straining hardware. Various textures and mapping techniques can be used to enhance realism efficiently.

Which Software is Best for 3D Texturing?

Several software options are widely used for 3D texturing:

  • Substance Painter: A powerful tool specifically designed for 3D texturing, offering advanced features like real-time painting and texture management.
  • Adobe Photoshop: Often used for creating and editing texture maps, especially for 2D applications and simple texturing tasks.
  • Blender: A free, open-source 3D software that includes texturing tools, allowing for both UV mapping and texture painting.
  • 3ds Max/Maya: Industry-standard software that includes robust texturing tools suitable for both beginners and professionals.

Where Do I Get 3D Modeling Textures?

You can obtain textures from various sources:

  • Texture Websites: Sites like Texture Haven, Poliigon, and Textures.com offer free and paid texture resources.
  • Asset Stores: Online marketplaces like the Unity Asset Store and Unreal Engine Marketplace provide textures tailored for game development.
  • Custom Creation: You can create your textures using photography, painting, or procedural generation techniques.

Why is 3D Texturing Important?

3D texturing plays a crucial role in:

  • Visual Realism: Textures enhance the realism of 3D models by adding color, detail, and surface properties.
  • Artistic Expression: They allow artists to convey specific styles, moods, and themes in their designs.
  • Optimizing Performance: Proper texturing can improve a model’s performance in real-time applications by reducing the need for high polygon counts.

How to Learn Texturing 3D?

To effectively learn 3D texturing, consider the following steps:

  1. Online Tutorials: Platforms like YouTube, Udemy, and Coursera offer a wealth of tutorials covering different aspects of 3D texturing.
  2. Practice Regularly: Work on small projects to apply what you learn, experimenting with different textures and techniques.
  3. Join Communities: Engage with online forums or social media groups where you can share your work, ask questions, and receive feedback.
  4. Explore Software Documentation: Familiarize yourself with the tools by exploring the documentation and official tutorials provided by the software you choose.
  5. Take Courses: Consider enrolling in specialized courses or workshops focused on 3D modeling and texturing.

Leave a Comment

Your email address will not be published. Required fields are marked *

Scroll to Top